Hello!
As a lot of people say that they don’t quite understand logic nodes, here is a overview of the basics on how to use them to create logic for your games.Let’s do this by creating a simple First Person Controller.
First, we need to have our character set up in Blender. For this tutorial, we are just going to use a box. Scale the box to a human’s size, make it a Rigidbody and set the shape to Capsule.
Next, parent a Camera to your Player and position it right there, where his face would be. Optionally set the FOV to 90.
Also a little place to walk arround on would be handy, so set up what ever you want. For me, a sunlamp, a plane and a monkey to jump on is going to cut it. Turn Rigidbody on for all objects you placed, and turn off “Dynamic” in the settings to make them static.
Your scene should now look something like this:
In the Render-tab -> Armory Player set the Camera to “Scene”, so when we hit F5 Armory uses the Camera to see through.
We want the body of the Player to move and rotate around the Z axis, and the Camera will only need to rotate around the X axis, and that you are able to move in all directions. To do that, open a Node editor and click the little controller icon. Most of the of this tutorial will play in this window. Click “+ New” to create a new Node tree and name it something like FPScontrolls.
We want the Player to move forward as long as we hold down “W”. So first create a “On keyboard” Node, set it to “W” and “Down”. Connect the (only) red output to the red input of the “Translate Object” Node. You can find these via shift-a -> Inputs / Actions or just search there for them.
This means that the “On keyboard” node will activate the “Translate Object” node as long as “W” is held down. All red in- and outputs work like that.
In the Object-field of the “Translate Object” Node, select your Player. When you click the Vector-field, you see the Vector in which the object is going to move(in order, XYZ). For now we are going to put in 0.1 in the Y-field, since my camera faces the Y direction.
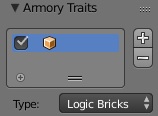
To make this logic effect the scene, we need to have it assigned to any Object. We are going to keep it simple at just assign it to the box, by selecting it, going in the “Object” tab in the properties, scrolling down to “Armory Traits”, creating a new slot with the + icon, setting its type to “Logic Nodes” and selecting the tree that we created in the editor.
Your scene should look like this now:
When we hit F5, we should be able to walk forward and fall down into an endless pit when we reach the end of the plane.
To walk backward, left and right, we just need to copy and adjust this setup.
Select the two nodes, press Shift-D and move the new ones below the old ones. The position of nodes on the canvas doesn’t matter, only their connections. Set the “On keyboard” node to “S” instead of “W”, and in the “Translate Object” node, set the Vector to 0,-0.1,0. Repeat that with the according Values for left and right.
When we hit F5 now, we can move in all directions!
Now let us create the logic to be able to look around with the mouse. Create a “On Update” node (in the Event tab), and plug it into the input of an “Rotate Object” node. Set the object to your Player. If we were to set the Vector to 0.1,0,0, the Player would rotate every frame 0.1 around the Z axis.
We only want the model of the player to rotate on the Z axis, as said before. To do that, create a “Mouse Cords” node (input tab) and separate its “Movement” Vector (Vectors are always purple) with the “Separate XYZ” node (Value tab).
Now we have the value of the players mouse movement, but we need it to be a Vector to work with the “Rotate Object Node” For that, create a “Vector” node (Variable tab) and plug the Z-output of the “Seperate XYZ” node into its Z input. Leave X and Y at 0. Connect the “Vector” node to the “Rotate Object” node.
When we hit F5, we should be able to look left and right with our mouse, but it is inverted, and SUPERFAST.
To cancel that, create a “Vector Math” node (value tab) and set it to multiply. We want it to multiply the movement of our mouse with a negative number greater than -1. To do that, we put it in between the “Rotate Object” and the “Vector” node, set its second input to something like -0.01,-0.01,-0.01 and set the whole node to multiply.
And hooray, we can look normal to the left and right now!!
Here is how you file should look like now:
But now we have a problem: when you walk forward, you do not walk where you are looking at! For that to not occur, we have to multiply the players rotation with the speed he should be traveling at.
First we set up walking forward. To do that, we create a “get Transform” node (value tab), set the object to our Player, and hook it up to a “Vector from Transform” node. Set its mode to “Look”. Now multiply it with the speed you want the Player to be travel at (0.05 seems fine) with the “Vector Math” node, and plug that into the “Translate Object” node that gets activated by pressing “W”. Yay, you now can properly walk forward!
If you try to plug the same Vector into the backwards “** Translate Object**” node, you will have to multiply it by -1 first (also with the “Vector Math” node)
To be able to walk properly to the left, we have to use the “Right” mode of the “Transform to Vector” node. Duplicate the old one (shift-D) and set it to that, and also hook the “get Transform” node back up to it. Multiply the vector again with the speed (and -1 for going right), connect the Vectors to their according “Translate Objects” and voila, that is fixed, too.
Your setup should now look something like this, I collapsed the *-1 nodes to save space.
No for looking up and down, I want to use a new Trait. Click on the little + icon at the bottom and name it something like FPScamera, and apply it to the Camera the same ways as with the other Trait.
We again want to get the the mouse’s movement with the “Mouse Cords” node, separate the Vector whit the “Separate XYZ”, but now we need to plug the Y output of the separating node into the X input of the “Vector” node. You multiply this again with the preferably same Value in the same way as we did when we set up the Z axis looking, and plug that Vector in a “Rotate Object” node, whose Object is set to the Camera and is being activated every frame, so into the red input goes an “On Update” node.
And now we should be able to look up and down!
Your Camera trait should look something like this:
Now we have to fix the issue that you can potentially break your neck when trying to look up, or sticking your head into yourself when looking down. We fix this checking every frame if the Cameras rotation is high/low, and then if it is, set it to its own rotation, but with the rotation’s vector’s X value set to a maximum/minimum.
To get the Camera’s rotation we use the “get Rotation” node (value tab) and set its object to the Camera. We again need to separate this vector with the “Separate XYZ” node. To check if the X value is above a certain Value, we use a “Gate” node (logic tab), which is being activated every frame by “On Update”, and is set to “Greater Equal”. Plug in the upper input the X value of the Camera’s rotation, and in the lower input the X rotation of the Camera when looking straight up, which is form some reason 3. You can plug this in by creating a “Float” node (variable tab).
The gate node only activates the node(s) being plugged into, when the condition being set is happening at that moment, and it also is being activated through another node (for ex. on update, on keyboard)
Now we connect a “set Rotation” node to it, set its object to the camera, and use as Vector the current Y and Z values of the camera’s rotation, and the maximum rotation you should be able to look up, so 3, as X value, in a new “Vector” node.
To also fix this when looking downwards, we can use the same setup wit a two changes. The “Gate” node is being set to “Less Equal”, and the the minimum Value needs to be 0.
Now you shouldn’t be able to break your neck!
And your Camera Trait should look like this:
Thats it for now! Maybe I will do a followup with jumping, global variables and perhaps shooting, depending on if I have time for that.

